Introduction to 7-Layer Bars
A sweet nostalgia: Why 7-Layer Bars are a must-try
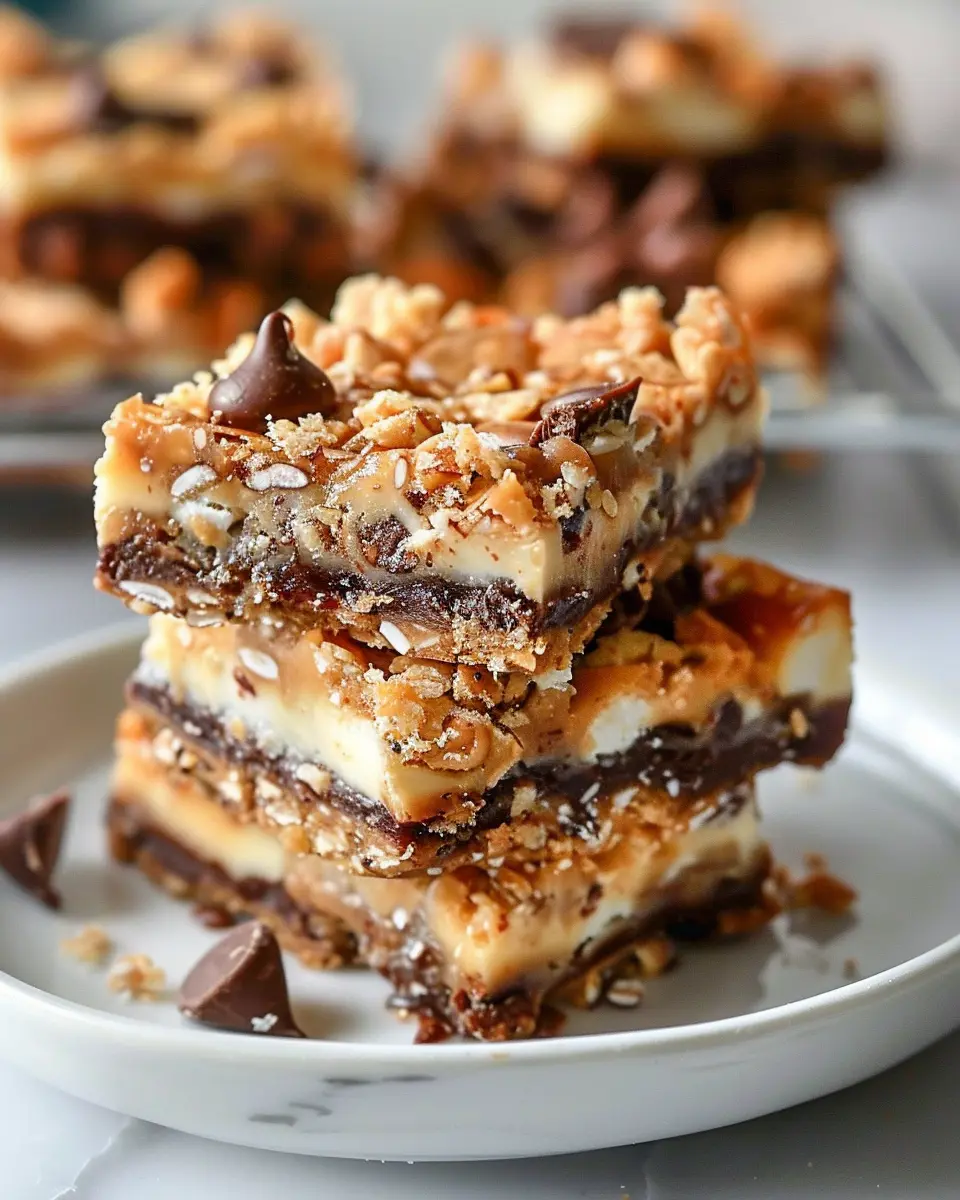
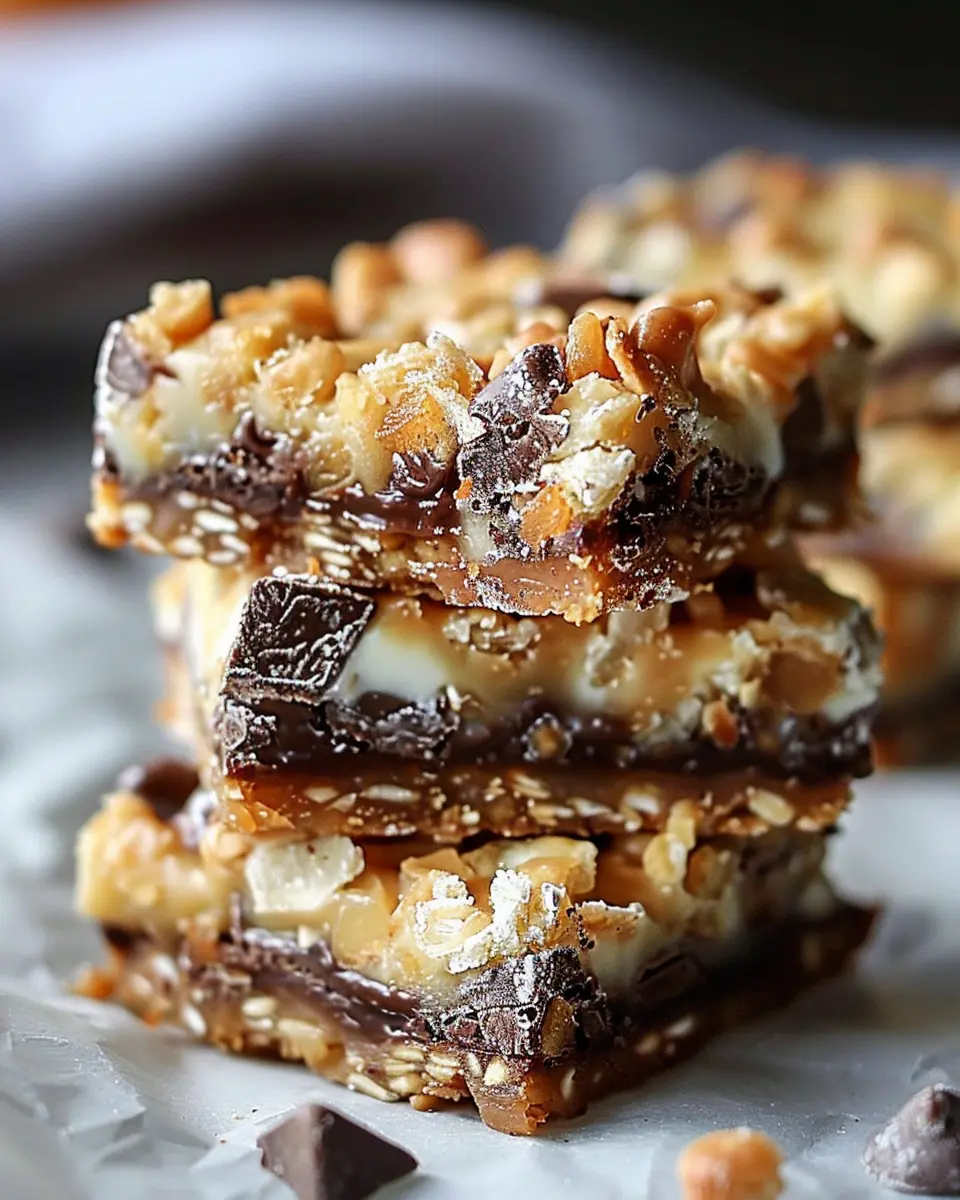
When it comes to creating lasting memories in the kitchen, 7-layer bars have been a beloved choice for generations. These treats are not just a dessert; they encapsulate the essence of comfort food, weaving layers of chocolate, coconut, and nuts into a harmonious blend of flavors and textures. If you haven’t yet indulged in a bite of these delightful bars, it’s time to discover what all the fuss is about!
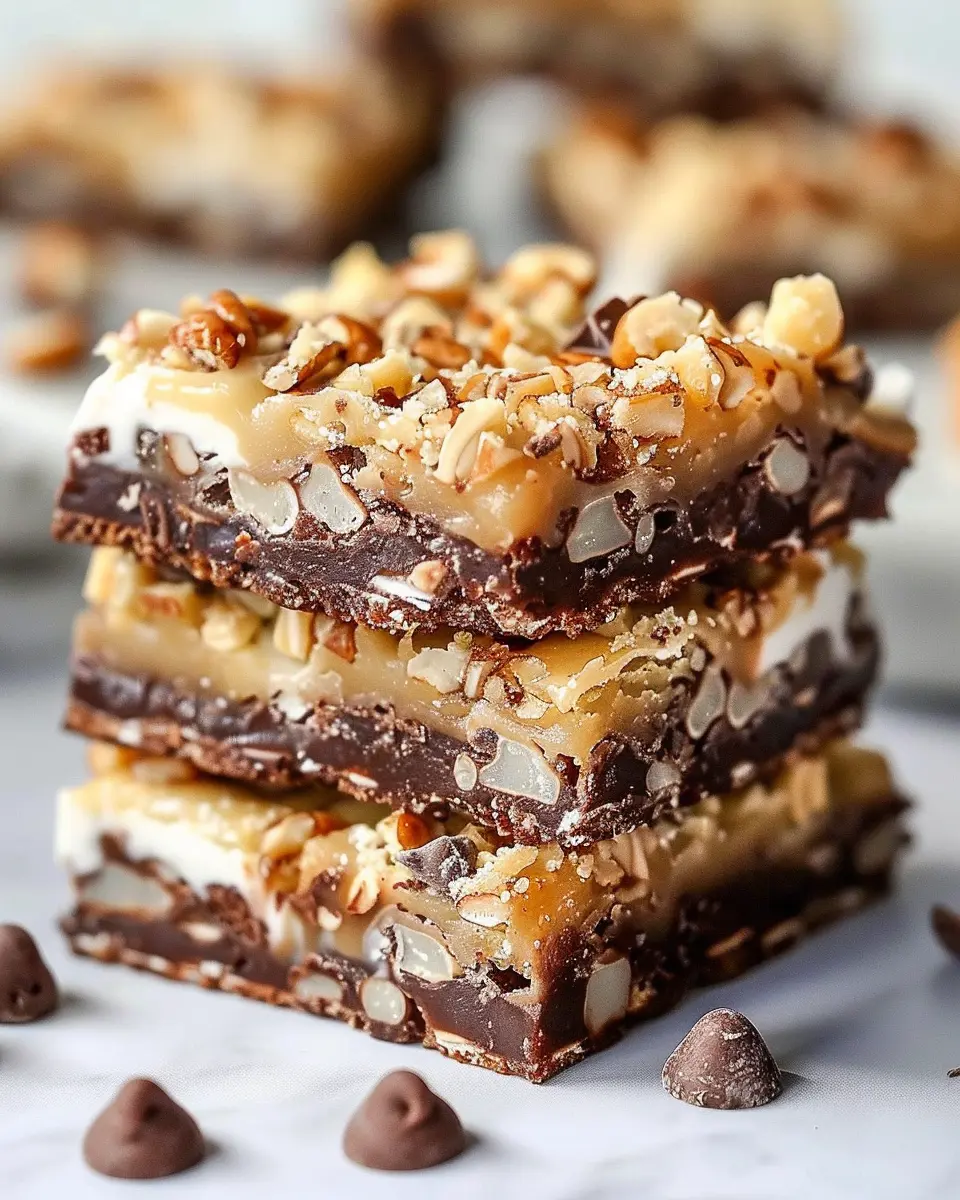
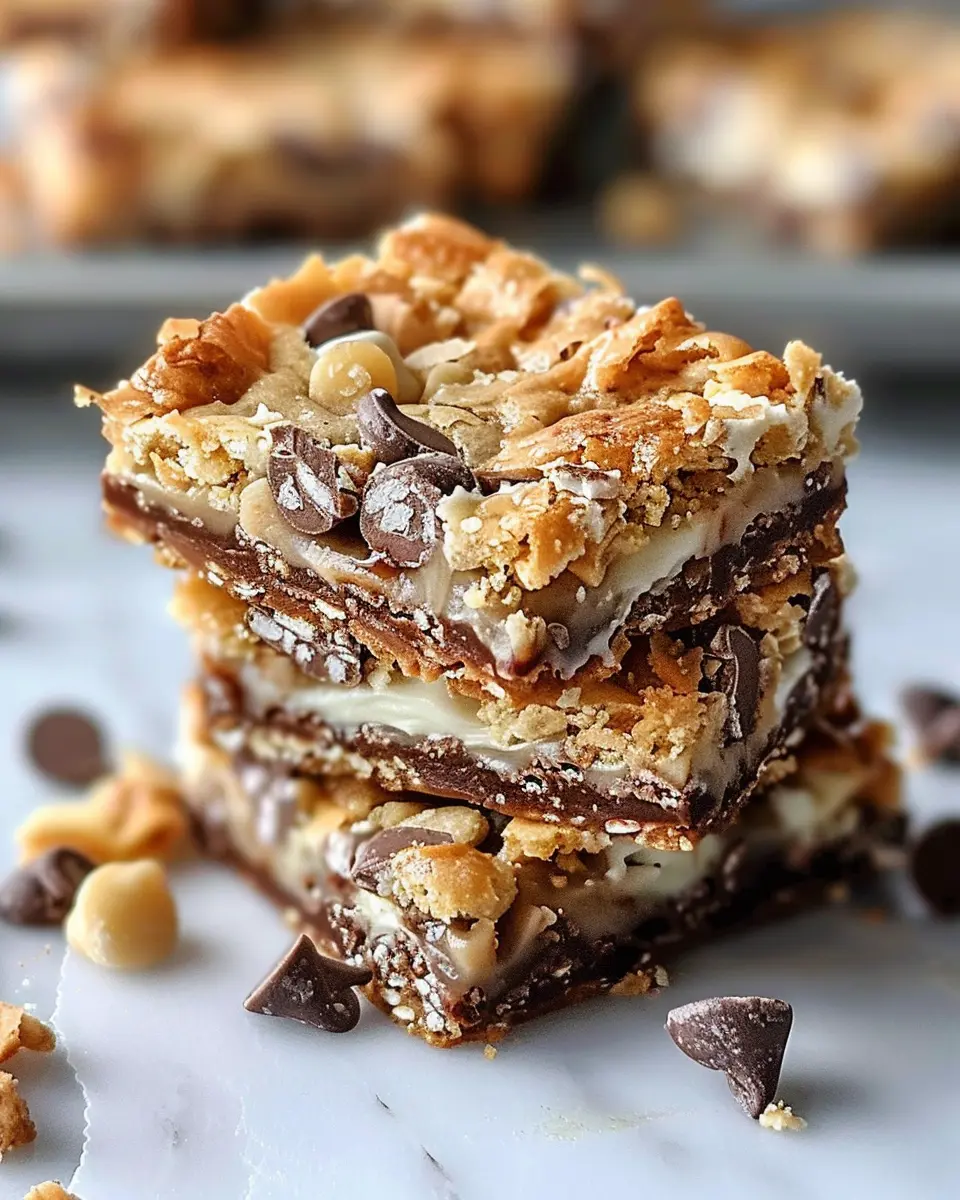
Originating in the mid-20th century, the 7-layer bar has become a staple in potlucks, birthday parties, and holiday gatherings. Each layer plays a crucial role, contributing to an overall experience that’s both nostalgic and exciting. Typically, you’ll find a buttery graham cracker crust, topped with rich chocolate chips, creamy butterscotch chips, crunchy nuts, and a generous sprinkle of shredded coconut, all held together with a sweet condensed milk drizzle.
One of the reasons these bars stand out is their sheer versatility. Many bakers have put their own spin on the traditional recipe by incorporating seasonal flavors or trending ingredients. For instance, you can replace the standard chocolate chips with dark chocolate or mint-flavored ones for a unique twist. Looking for ideas? Check out this detailed 7-layer bar inspiration guide to help spark your creativity!
But it’s not just about taste—there’s something inherently satisfying about layering these ingredients while baking. It’s a chance for sabbatical from the hustle and bustle of professional life, even if just for a moment. Have you ever found yourself reminiscing about homemade treats from your childhood? That warm, gooey goodness somehow feels like a hug in bar form.
Beyond the warm, fuzzy nostalgia they invoke, 7-layer bars are perfect for busy young professionals. They’re quick to assemble, bake, and equally fantastic for sharing (or keeping all to yourself). So gather your ingredients and get ready to create a delicious treat that’s not only a feast for your taste buds but also a joyful journey down memory lane. Trust us, once you try them, you’ll be measuring the success of your gatherings by the presence of these delectable bars!
Ingredients for 7-Layer Bars
Essential ingredients for a perfect batch
Ready to whip up a decadent batch of 7-Layer Bars? This treat is all about layers of flavor, texture, and irresistible sweetness. Here’s what you’ll need to create that perfect indulgence:
- Graham Cracker Crumbs: The base of your bars, providing a sweet, crunchy foundation.
- Sweetened Coconut Flakes: For that tropical flair, coconut adds chewiness and richness.
- Chocolate Chips: Dark or semi-sweet, they bring a melty, luscious layer that pairs beautifully with other ingredients.
- Butterscotch Chips: This adds a unique sweetness that complements the chocolate perfectly.
- Chopped Nuts: Walnuts or pecans work well here, adding crunch and depth to your 7-Layer Bars.
- Condensed Milk: A creamy binding agent that holds everything together while adding sweetness.
- Butter: Melted, it mixes seamlessly to enhance the overall richness.
These simple ingredients create a heavenly treat that’s not only delicious but also easy to prepare. If you’re curious to learn more about variations or tips for achieving the best texture, check out this guide on layering flavors for some expert insights!
Step-by-step Preparation of 7-Layer Bars
Creating 7-layer bars at home is an adventure in flavors and textures that is well worth the time. Whether you’re treating yourself after a long week or preparing something delicious for a gathering, following this step-by-step preparation will ensure your bars turn out perfectly every time. Let’s dive into the art of making these delicious treats!
Gather Your Ingredients
Before you begin, it’s important to have all your ingredients on hand. This will streamline the cooking process and prevent any kitchen mishaps. You’ll need:
- 1 and ½ cups graham cracker crumbs
- 1 cup sweetened shredded coconut
- 1 cup semi-sweet chocolate chips
- 1 cup butterscotch chips
- 1 can (14 oz) sweetened condensed milk
- ½ cup chopped nuts (walnuts or pecans work great)
- ½ cup (1 stick) unsalted butter, melted
Gathering these items ahead of time will make the overall experience so much smoother. Plus, who doesn’t love a well-organized kitchen?
Preheat and Prepare the Baking Dish
Next up, it’s time to preheat your oven. Set it to 350°F (175°C) to get it warmed up while you prepare the rest of your ingredients. Then, grab a 9×13-inch baking dish and grease it lightly with non-stick cooking spray or line it with parchment paper for easy removal later on. This not only prevents sticking but also makes for a cleaner presentation when you’re ready to slice your bars.
Make the Graham Cracker Crust
Now, let’s create the base for your 7-layer bars. In a mixing bowl, combine the graham cracker crumbs and melted butter. Stir until fully blended. The mixture should resemble wet sand. Pour this mixture into your prepared baking dish and press it down firmly and evenly with the back of a measuring cup. A solid base is key for bars that slice nicely!
Layer the Delightful Ingredients
This is where the fun begins! Start layering your ingredients over the prepared graham cracker crust. Here’s the order to follow:
- Sprinkle the chocolate chips evenly over the crust.
- Follow with a layer of butterscotch chips.
- Next, add a generous layer of the shredded coconut.
- And finally, sprinkle the chopped nuts over the top.
Feel free to layer to your taste! Each ingredient brings its own unique flavor, and you might even experiment with additional ones, like toffee bits or peanut butter chips.
Pour the Sweetened Condensed Milk
This step is vital as the sweetened condensed milk acts as a binding agent for your layers. Pour it evenly over the entire mixture, making sure to cover all the layers. This creates that delicious, gooey texture that we all love about 7-layer bars!
Bake to Perfection
Now that everything is assembled, pop your baking dish into the preheated oven. Bake for 25-30 minutes or until the top is golden brown. The aroma wafting through your kitchen during this time will be absolutely irresistible! Keep an eye on it to avoid over-baking; that’s the enemy of a good bar.
Cool and Slice
Once baked, remove your 7-layer bars from the oven and let them cool in the dish for at least 20-30 minutes. For best results, transfer them to the refrigerator for a bit longer to set. When completely cool, slice them into squares or bars. Use a sharp knife for clean cuts and serve them up as the perfect sweet treat!
And there you have it! With this step-by-step guide, you’re all set to impress friends, family, or just satisfy your own sweet tooth. For more baking tips and inspiration, check out this insightful article on baking basics here. Enjoy your baking adventure with these 7-layer bars!
Variations on 7-Layer Bars
Fun twists to the classic 7-Layer Bars
If you adore the delightful combination of textures and flavors found in 7-Layer Bars, you’re in for a treat! Here are a few fun twists to make these bars your own:
- Nutty Variation: Swap out the classic graham cracker crust for a crushed almond or pecan crust. This will not only add a unique flavor profile but also bring a nutty crunch that complements the sweet layers beautifully.
- Nutella Layer: Imagine a velvety layer of Nutella between the chocolate chips and coconut. This will instantly transform your bars into a decadent delight.
- Fruit Lovers Delight: Consider adding a layer of dried fruits like cherries, apricots, or even diced apples for a chewy surprise. Fruits add texture and a subtle tartness that cuts through the sweetness.
These creative alterations can breathe new life into 7-Layer Bars, making them perfect for any gathering.
Adding seasonal flavors for a fun twist
As the seasons change, so can your 7-Layer Bars! Embrace seasonal flavors for a festive touch:
- Pumpkin Spice: In the fall, include a layer of pumpkin puree mixed with warm spices to embody the essence of autumn. Top it with a sprinkling of chopped pecans to enhance the flavor.
- Peppermint Surprise: During the holidays, add crushed peppermint candies to the chocolate chips for a refreshing crunch that complements the sweetness.
- Citrus Zest: In the summer, brighten up your bars with a hint of lemon or orange zest. This adds a refreshing twist that’s particularly lovely when served chilled.
With such variations, each bite can transport you to a different season, allowing you to enjoy 7-Layer Bars in a whole new way. For more seasonal recipes, check out Food Network for ideas.
Cooking Tips and Notes for 7-Layer Bars
When it comes to creating the perfect 7-Layer Bars, a few cooking tips can really elevate your experience, both in texture and flavor.
Pro tips for the best texture and flavor
To achieve that chewy, gooey goodness:
-
Use Fresh Ingredients: Fresh nuts, chocolate, and coconut make a significant difference. Stale ingredients can lead to off flavors.
-
Layer Smartly: Distributing each layer evenly is key. This ensures every bite has a delightful mix of ingredients. Aim for about 1/4 inch thickness for each layer.
-
Bake Wisely: Monitor your oven closely. Underbaking can leave the bars too soft, while overbaking might dry them out. A golden-brown top is ideal.
-
Let Cool: Allow the bars to cool completely in the pan before cutting. This helps them firm up nicely and results in cleaner square edges.
For more insights on baking techniques, visit Joy of Baking for some professional tips. With these strategies, your 7-Layer Bars will surely impress!
Serving Suggestions for 7-Layer Bars
Perfect pairings for your magical bars
When it comes to 7-layer bars, the fun doesn’t end when they’re out of the oven. These chewy, gooey delights can be served in many imaginative ways that elevate their rich flavors. Here are some engaging ideas for you to try:
-
Coffee or Tea: Pair your bars with a steaming cup of coffee or your favorite herbal tea. The bitterness of coffee complements the sweetness of the bars beautifully. If you’re in the mood, consider a vanilla chai for a unique twist.
-
Milk: A classic choice! A glass of cold milk can cool down the sweetness and enhance every layer’s unique flavor. It’s a nostalgic combo that takes you back to your childhood.
-
Ice Cream: Transform your 7-layer bars into a dessert masterpiece by serving them warm with a scoop of vanilla or chocolate ice cream on top. The contrast of hot and cold will have your taste buds dancing.
-
Fresh Fruits: Consider side servings of fresh berries or sliced fruits, like strawberries or bananas. They add a burst of freshness that counterbalances the richness of the bars.
These pairings not only enhance the flavor experience but also make for inviting serving options at your next gathering. Want more ideas? Check out the great food pairing tips over at Food & Wine.
Time Breakdown for Making 7-Layer Bars
Preparation Time
Making 7-layer bars is a delightful experience that won’t take up too much of your day. You’ll need about 15 minutes to gather your ingredients and put together the layers. This is your chance to get creative—lay out your nuts, chocolate, and coconut however you like!
Baking Time
Once you pop these delicious bars into the oven, they’ll need approximately 25 minutes to bake. Make sure to keep an eye on them to ensure they’re golden and the layers meld beautifully together.
Total Time
In total, you’re looking at around 40 minutes from start to finish. In less than an hour, you’ll have a scrumptious treat that’s perfect for any gathering. Whether you’re having friends over or just treating yourself, these 7-layer bars are worth every minute!
For more tips on quick baking, check out resources like Joy of Baking or King Arthur Baking for inspiration.
Nutritional Facts for 7-Layer Bars
When indulging in 7-layer bars, it’s great to be aware of their nutritional profile. These mouthwatering treats may be irresistibly delicious, but understanding their components helps you enjoy them in moderation.
Calories
Each 7-layer bar serving typically contains around 150-200 calories. While this makes them a satisfying sweet treat, it’s smart to keep portion sizes in mind.
Fats
These bars pack in approximately 8-10 grams of fat per serving, largely due to the combination of coconut and chocolate. Opting for lighter versions or reducing the amount of butter can help you enjoy the same flavor with fewer fats.
Sugar Content
One of the standout features of 7-layer bars is their sweetness, with sugar content averaging about 12-15 grams per serving. Considering alternatives like agave syrup or honey can slightly cut down on sugar without sacrificing taste.
Looking for more insights on healthy baking alternatives? Check out resources from the American Heart Association to make informed choices.
FAQs about 7-Layer Bars
Can I make these bars gluten-free?
Absolutely! Making 7-Layer Bars gluten-free is quite simple. Just swap out the traditional graham cracker crust for gluten-free graham crackers or even crushed almonds for a nutty twist. Many brands offer gluten-free alternatives that taste fantastic, so you won’t have to compromise on flavor or texture.
What’s the best way to store 7-Layer Bars?
The way you store your 7-Layer Bars can really affect their longevity and taste. Here’s how to keep them fresh:
- At Room Temperature: If you plan to enjoy them within a few days, store them in an airtight container at room temperature.
- Refrigerator: For longer-lasting freshness, keep them in the fridge for up to a week. Wrap them individually to prevent sticking.
- Freezer: Feeling like you need to stash some for later? Freeze them for up to three months in a freezer-safe container or wrapped tightly in plastic wrap. Just thaw them in the refrigerator when you’re ready to indulge!
How can I customize the flavors?
One of the most delightful aspects of 7-Layer Bars is their versatility! Here’s how to put your personal spin on them:
- Nuts: Experiment with different nuts—try cashews or macadamias for a tropical touch.
- Chips: Substitute chocolate chips with white chocolate, butterscotch, or even peanut butter chips for a unique flavor profile.
- Fruits: Adding dried fruits like cranberries or mango can brighten the flavor and add a chewy texture.
Feel free to get creative! The beauty of these bars is that they can be tailored to your taste preferences. So ask yourself, what flavors make you swoon? For more insights on customizing your dessert recipes, check out this helpful guide from Food Network.
Happy baking, and enjoy making these delicious 7-Layer Bars!
Conclusion on 7-Layer Bars
Final thoughts and encouragement to dig in
As we wrap up our journey into the delicious world of 7-Layer Bars, it’s clear these treats are more than just a dessert; they’re a delightful blend of flavors and textures that can bring joy to any occasion. These bars are perfect for sharing at gatherings or simply enjoying with your favorite coffee after a long day.
Don’t be shy—experiment with your layers! Whether you add more chocolate chips or throw in nuts for extra crunch, the sky’s the limit. So grab your ingredients and start baking your own batch of 7-Layer Bars. You won’t regret it; your taste buds will thank you! For more dessert inspiration, check out sites like Serious Eats and Bon Appétit for new ideas. Happy baking!
Print7-Layer Bars: The Best Indulgent Treat You Can Bake at Home
7-Layer Bars are a delicious combination of flavors and textures, perfect for satisfying your sweet tooth.
- Prep Time: 15 minutes
- Cook Time: 30 minutes
- Total Time: 45 minutes
- Yield: 24 bars 1x
- Category: Dessert
- Method: Baking
- Cuisine: American
- Diet: Vegetarian
Ingredients
- 1 cup graham cracker crumbs
- 1/2 cup unsalted butter, melted
- 1 cup sweetened shredded coconut
- 1 cup chocolate chips
- 1 cup butterscotch chips
- 1 can (14 oz) sweetened condensed milk
- 1/2 cup chopped nuts (optional)
Instructions
- Preheat your oven to 350°F (175°C).
- In a bowl, combine graham cracker crumbs and melted butter. Press the mixture into the bottom of a greased 9×13 inch pan.
- Layer the coconut, chocolate chips, butterscotch chips, and nuts over the crust.
- Pour the sweetened condensed milk evenly over the top.
- Bake for 25-30 minutes or until golden brown.
- Allow to cool before cutting into squares.
Notes
- Experiment with different types of chocolate for variety.
- These bars can be made a day in advance for convenience.
Nutrition
- Serving Size: 1 bar
- Calories: 200
- Sugar: 15g
- Sodium: 50mg
- Fat: 10g
- Saturated Fat: 6g
- Unsaturated Fat: 4g
- Trans Fat: 0g
- Carbohydrates: 25g
- Fiber: 1g
- Protein: 2g
- Cholesterol: 15mg
Keywords: 7-Layer Bars, dessert, baking, sweet treats