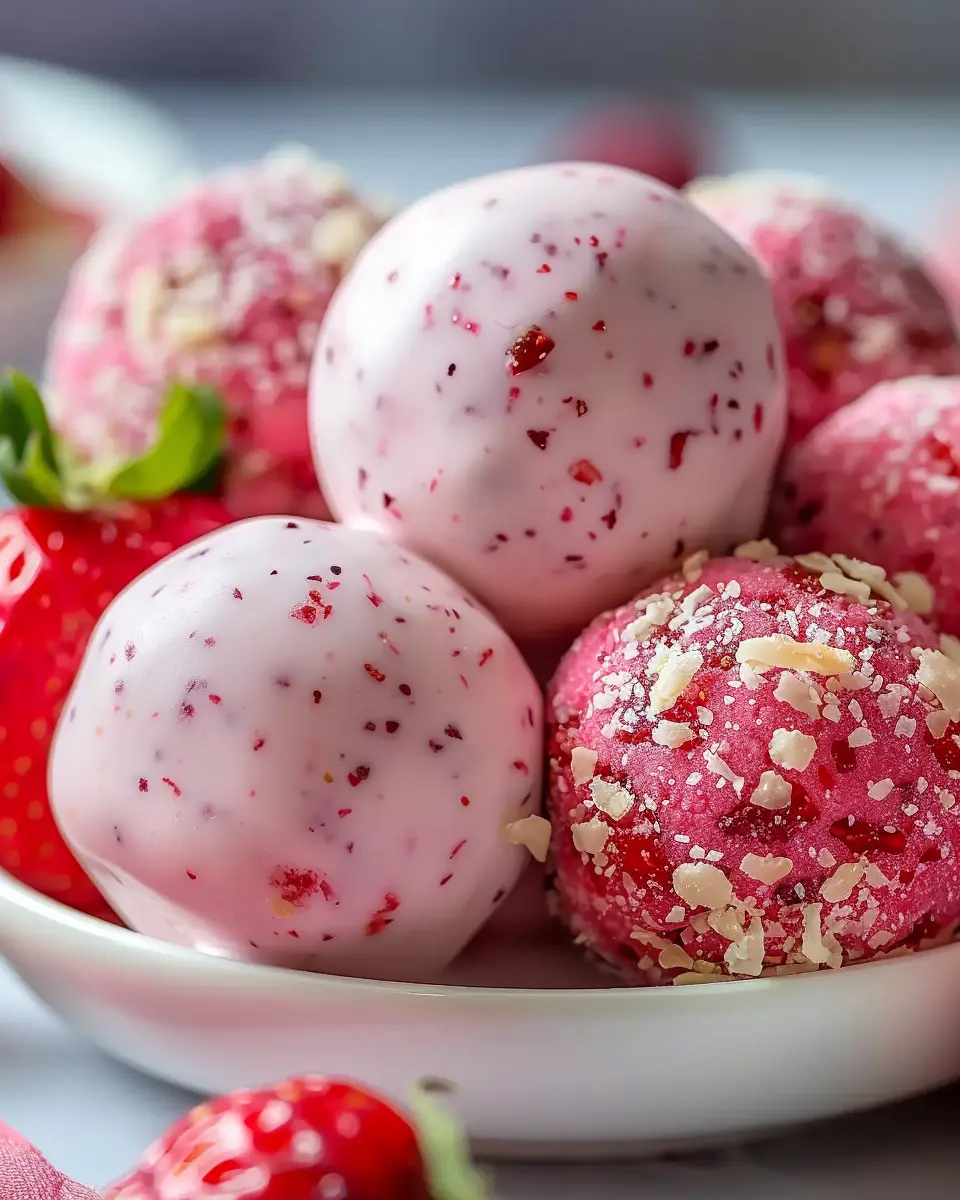

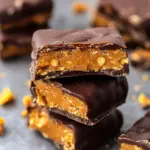
Introduction to Healthy Homemade Butterfingers
Ah, candy bars. Just the mention of them sparks a wave of nostalgia, transporting us back to childhood days filled with simple joys—like the satisfying crunch of a Butterfinger. Remember that irresistible combination of creamy peanut butter enveloped in a crispy shell, all coated in rich chocolate? This beloved treat has held a special place in many of our hearts (and stomachs). But as adults, our cravings for sweet comfort often collide with a desire to eat healthily.
This is where the trend toward healthier alternatives comes in. With the growing awareness of nutrition, many people are looking for ways to satisfy their sweet tooth without the guilt. According to research from the Harvard School of Public Health, nearly 70% of Americans say they are trying to cut back on processed sugars and unhealthy fats. If you’re one of them, you might think that means waving goodbye to your favorite candy bars forever. But wait—there’s good news!
Enter the world of homemade treats, where you can whip up a batch of healthy homemade Butterfingers right in your kitchen. Imagine enjoying a snack that’s not only delicious but also packed with ingredients you can trust. Not just a copycat of the original, these treats can be customized to suit your tastes and dietary needs. Whether you’re avoiding refined sugars or seeking more protein, you can adjust the recipe to create a healthier version that doesn’t skimp on flavor.
Making your own candy bars not only lets you control what goes into them but also provides a fun cooking challenge. Plus, you can proudly share your creations with friends and family. They’ll be amazed at how delightful these homemade versions are! And with the right ingredients—think dark chocolate, natural peanut butter, and perhaps even a hint of coconut oil—you can craft a treat that’s both indulgent and nourishing.
So, let’s dive into a delightful exploration of how to make your very own healthy homemade Butterfingers! Whether it’s for a guilty pleasure or a sweet treat after a long day, this recipe is about to become a favorite in your culinary arsenal.
Ingredients for Healthy Homemade Butterfingers
Essential ingredients for the perfect treat
When crafting your healthy homemade Butterfingers, start with these essential ingredients. You’ll need:
- Natural peanut butter: This is your star ingredient, providing that classic flavor and creamy texture. Opt for unsweetened for extra health benefits.
- Pure maple syrup or honey: These natural sweeteners will give you that sugary delight without refined sugars.
- Coconut flour: This ingredient not only acts as a binder but also adds a nutty flavor and is rich in fiber.
- Dark chocolate chips: Look for high-quality dark chocolate with at least 70% cocoa for a guilt-free indulgence.
These tasty ingredients come together to recreate the beloved Butterfinger experience, making it healthier and more nutritious.
Substitutions and variations for dietary needs
Got dietary restrictions? No problem! Feel free to swap ingredients to create your perfect healthy homemade Butterfingers.
- Nut-free: Use sunflower seed butter instead of peanut butter for a similar texture and taste.
- Vegan: Substitute honey with agave syrup or another vegan sweetener.
- Gluten-free: Ensure your coconut flour is certified gluten-free.
With these easy tweaks, you can cater to any dietary need while still enjoying a delicious treat! For more ingredient options and nutritional information, check out the Whole Grains Council.
Preparing Healthy Homemade Butterfingers
Making healthy homemade Butterfingers is not only fun but also a satisfying way to indulge in a nostalgic treat without the guilt. Let’s walk through each step together so you can create your own batch of these delectable bites. Trust me; after making these, a store-bought version will never seem appealing again!
Gather Your Kitchen Essentials
Before diving into the preparation, it’s important to gather all the necessary ingredients and tools. You’ll want to have:
-
Ingredients:
-
1 cup natural peanut butter (smooth or crunchy, your choice)
-
2 cups corn flakes (look for whole grain for added health benefits)
-
1/4 cup honey or maple syrup for sweetness
-
A pinch of salt
-
1 cup dark chocolate chips (use dairy-free if you prefer)
-
Tools:
-
Mixing bowl
-
Baking sheet lined with parchment paper
-
Microwave-safe bowl for melting chocolate
-
Spoon or spatula for mixing
-
Plastic wrap or airtight container for storage
Getting everything ready first will ensure a smoother baking experience.
Prepare the Crunchy Filling with Corn Flakes
Next, let’s prepare that satisfying, crunchy filling that makes healthy homemade Butterfingers irresistible. Start by crushing the corn flakes in a mixing bowl. You don’t need to pulverize them; just break them down a bit to give your filling some texture. This is where the magic happens!
- Use your hands or a rolling pin to gently crush the corn flakes.
- Combine the crushed corn flakes with a pinch of salt and honey (or syrup) in the bowl.
- Mix well until the corn flakes are fully coated with the sweetener.
This blend of textures will set the foundation for the rest of your Butterfinger.
Create the Rich Peanut Butter Mixture
Now it’s time to make your peanut butter mixture, which is simply delicious and serves as the heart of these bars. In a separate bowl, combine the peanut butter with the remaining sweetener, adjusting the sweetness level to your preference.
- Stir until well-mixed and creamy; a thick consistency is what you want here.
- If you prefer a bit more flavor, consider adding a dash of vanilla extract.
This rich mixture will complement the crunch from your corn flakes beautifully.
Combine and Shape Your Butterfinger “Dough”
With your crunchy and smooth components ready, it’s time to bring everything together.
- Gently fold the corn flake mixture into the peanut butter blend.
- Make sure all the corn flakes are evenly coated — this is crucial for the right texture!
- Once combined, press the mixture into the prepared baking sheet, spreading it out evenly. A uniform thickness of about 1/2 inch works best.
After pressing, place the baking sheet in the fridge for about 15-20 minutes to firm up the mixture, making it easier to cut into bars.
Melt the Chocolate for That Irresistible Coating
While the Butterfinger mixture is chilling, it’s the perfect time to melt your chocolate.
- Use a microwave-safe bowl and heat the chocolate chips in 30-second increments, stirring in between until smooth. This will ensure your chocolate doesn’t burn.
- If you want to make it a bit healthier, consider mixing in a tablespoon of coconut oil to thin it out for easier coating.
Chocolate brings that rich flavor and beautiful sheen that we all associate with traditional Butterfingers.
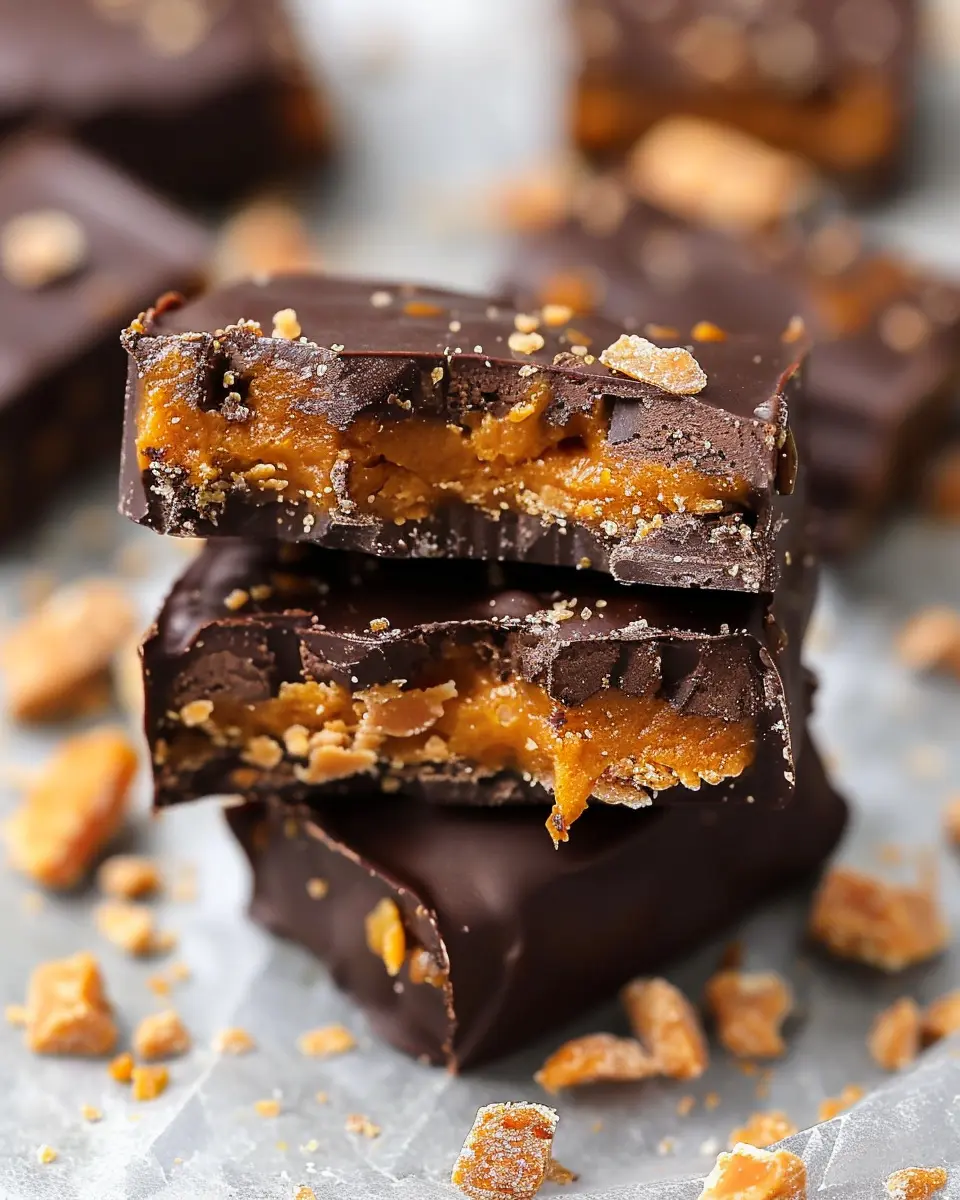
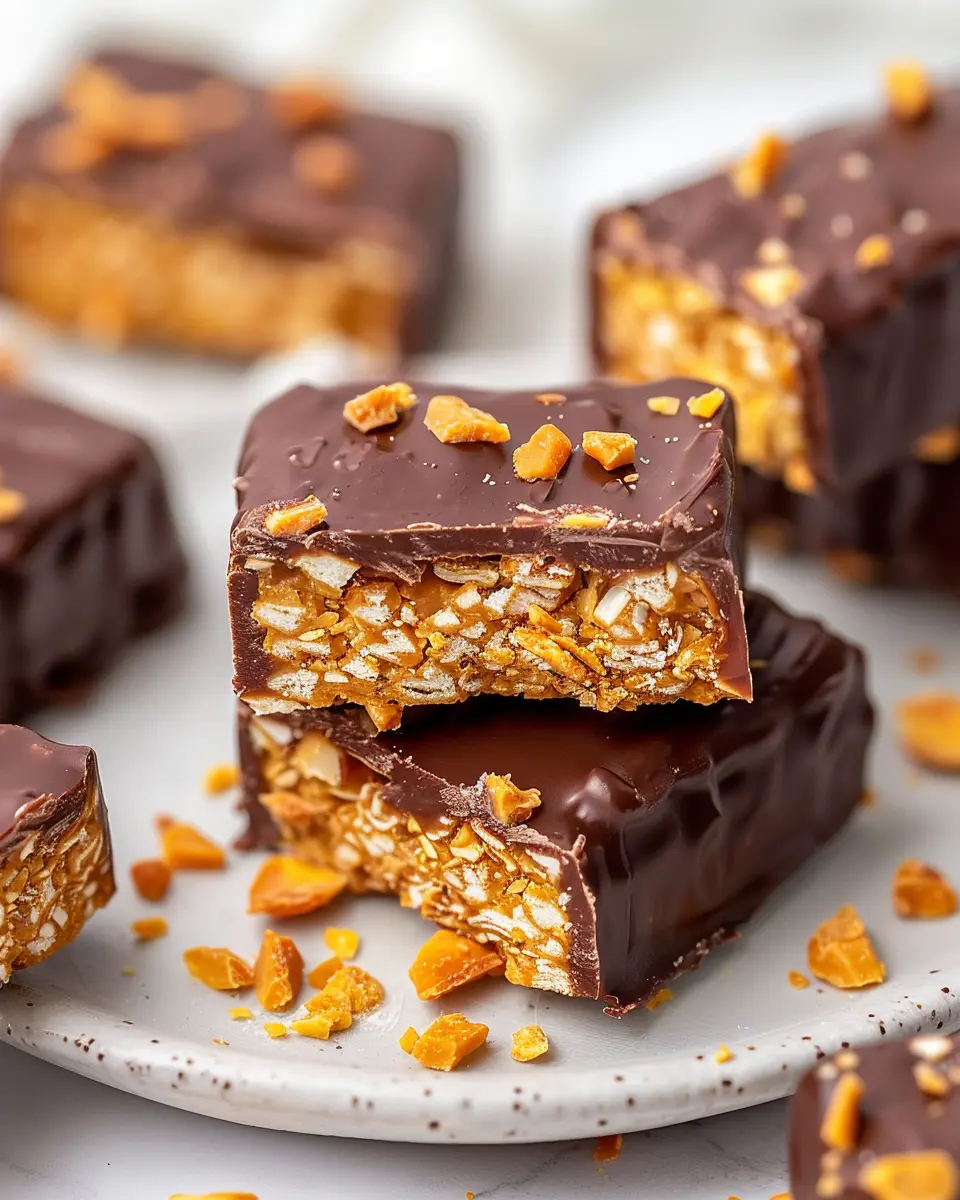
Assemble and Freeze for Delicious Results
After your mixture has set, remove it from the fridge and cut it into bars or bite-sized pieces.
- Dip each piece into the melted chocolate, covering it completely.
- Place the chocolate-coated bars back on the parchment paper and freeze them for another 20-30 minutes or until the chocolate has completely hardened.
And there you have it! Your healthy homemade Butterfingers are ready to enjoy. Store any leftovers in an airtight container in the fridge. Believe me, they won’t last long!
Partner your creations with your favorite health-conscious beverage (like herbal tea or nut milk) and savor the goodness. Happy snacking!

Variations on Healthy Homemade Butterfingers
When it comes to crafting your healthy homemade butterfingers, there’s no shortage of delightful variations to explore. Let’s dive into some delicious alternatives that can elevate your candy-making experience!
Peanut Butter Alternatives: Almond or Sunflower Seed Butter
While classic peanut butter is fantastic, experimenting with alternatives like almond butter or sunflower seed butter can bring new flavors to your treats. Almond butter offers a rich, nutty taste and creaminess, while sunflower seed butter is perfect for those with nut allergies. Both options maintain that delightful texture while adding their unique twist. For more on nut butters, check out this resource from the Creamy Nut Butter Association.
Experimenting with Different Cereals for Unique Textures
Another fun way to customize your healthy homemade butterfingers is by swapping out cereals. Traditional recipes often call for crispy rice cereal, but why not try granola for a heartier bite or shredded wheat for a different crunch? Each type of cereal can change not only the flavor but also the texture, adding an exciting twist to your candy.
Adding Flavor Enhancements: Vanilla, Cinnamon, or Sea Salt
Do you want to elevate the taste even further? Consider adding flavor enhancements! A splash of vanilla extract can bring warmth to your creation, while a sprinkle of cinnamon will lend a cozy, festive touch. For a surprising contrast, finish with a pinch of coarse sea salt, which beautifully balances the sweetness. Tiny tweaks can make a huge difference!
Why not experiment with these ideas for your next batch of healthy homemade butterfingers? Your taste buds will thank you!
Cooking Tips and Notes for Healthy Homemade Butterfingers
Preventing Chocolate from Seizing Up
When melting chocolate for your healthy homemade Butterfingers, the last thing you want is for it to seize into a gritty mess. To avoid this mishap, ensure your mixing bowl and utensils are completely dry. Even a small amount of moisture can cause the chocolate to clump. If you’re using a microwave, melt in short intervals, stirring frequently. Another great tip is to add a spoonful of coconut oil to the chocolate before melting; it helps to keep it smooth and glossy. For more detailed techniques on chocolate tempering, check out experts like The Chocolate Life.
Storing Your Homemade Butterfingers for Maximum Freshness
To maintain the deliciousness of your healthy homemade Butterfingers, store them properly. Place them in an airtight container and keep them in the refrigerator for up to two weeks. If you want to make a larger batch, consider wrapping each piece individually in parchment paper, then freezing them. They can last up to three months this way! When you’re ready to enjoy, just let them sit at room temperature for a few minutes to soften. Proper storage not only keeps your treats fresh but also makes them easy to grab on a busy day. Who doesn’t love a sweet yet healthy snack on the go?
Serving suggestions for Healthy Homemade Butterfingers
Pairing with fruits or nuts for balanced snacking
When it comes to enjoying healthy homemade Butterfingers, consider pairing them with fresh fruits or a handful of nuts. The sweetness of fruits like apples or pears complements the rich, chocolatey flavor, making for a delicious snack. You could also try almonds or walnuts for added crunch and a healthy dose of protein. This mix not only satisfies your sweet tooth but also keeps you full longer!
Creative ways to serve them at gatherings or parties
If you’re hosting a gathering, serving healthy homemade Butterfingers can be a delightful surprise for your guests. Consider slicing them into bite-sized pieces and presenting them on a colorful platter, perhaps alongside some dips like Greek yogurt or dark chocolate sauce. For a twist, you could create a fun butterfinger charcuterie board, including cheeses, fresh fruits, and even turkey bacon for savory balance. These creative serving ideas not only elevate your snack game, but they also encourage social sharing—who wouldn’t want to try a healthier version of a classic treat?
For more ideas on party food pairings that everyone will love, check out this guide on charcuterie boards.
Time breakdown for Healthy Homemade Butterfingers
Preparation time
Creating your healthy homemade butterfingers begins with the fun part—prepping the ingredients! You’ll need about 15 minutes to gather everything and mix the base. Keep things engaging by setting up a mini assembly line—chop, mix, and shape!
Freezing time
Once you’ve shaped your healthy homemade butterfingers, it’s time for them to set. Pop them in the freezer for 30 minutes. This step not only helps them firm up but adds to that delightful texture we love in a classic butterfinger.
Total time
In just under an hour, you can whip up and enjoy these guilt-free treats! With only 45 minutes from start to finish, you’ll have a tasty snack ready to satisfy your cravings. Who said healthy snacking couldn’t be quick and fun? For more ideas, check out this resource for quick recipes that fit your busy lifestyle!
Nutritional facts for Healthy Homemade Butterfingers
Caloric breakdown per serving
When indulging in these healthy homemade Butterfingers, knowing their caloric breakdown can help you savor every bite guilt-free. Each serving contains approximately 120 calories. This allows you to enjoy a sweet treat while maintaining a balanced diet.
Key nutrients and health benefits
These homemade Butterfingers are not only tasty but also packed with essential nutrients:
- Protein: Boost your protein intake with around 5 grams per serving, thanks to the nut butter base.
- Healthy Fats: The use of nut butter provides heart-healthy fats that keep you satisfied longer.
- Fiber: Each serving contains about 2 grams of fiber, promoting healthy digestion.
Incorporating these healthy homemade Butterfingers into your snack rotation can satisfy your sweet tooth while supporting your nutritional goals. Curious about how to make them even healthier? Check out more tips here. With every bite, you’re not just treating yourself; you’re feeding your body good fuel, too!
FAQs about Healthy Homemade Butterfingers
When it comes to creating healthy homemade Butterfingers, you probably have a few questions swirling in your mind. Let’s address some of the most common ones!
How can I make these bars even healthier?
If you’re looking to boost the health factor of your healthy homemade Butterfingers, consider these simple tips:
- Sweeteners: Swap refined sugars for natural sweeteners like maple syrup or honey. They provide sweetness while containing more nutrients.
- Nuts: Using a blend of nuts adds healthy fats and protein. Almonds, walnuts, or even seeds can enhance both flavor and nutritional value.
- Protein Powder: Tossing in a scoop of your favorite plant-based protein powder can make these bars even more filling.
Can I make them vegan or nut-free?
Absolutely! You can customize your healthy homemade Butterfingers to suit various dietary needs:
- Vegan: Replace any honey with agave nectar or another plant-based sweetener. Use coconut oil or vegan butter to help achieve that creamy texture.
- Nut-Free: If you or someone you’re serving is allergic to nuts, consider using sunflower seed butter or sunflower seed flour instead. This keeps the recipe nut-free while still offering great flavor and texture.
How long do they keep in the freezer?
These delicious treats can last in the freezer for about 3 months. Just be sure to wrap them tightly in parchment paper and store them in an airtight container. This way, they’ll maintain their flavor and texture. You can also check out resources like FoodSafety.gov for more tips on food storage.
Having your own stash of healthy homemade Butterfingers at your disposal is not only a treat but also a delightful way to indulge without the guilt! If you have more questions, don’t hesitate to ask!
Conclusion on Healthy Homemade Butterfingers
The joy of a healthier treat without the guilt
Making your own healthy homemade Butterfingers brings the satisfaction of enjoying a classic treat while keeping your wellness goals intact. These delightful bites allow you to indulge in a chocolatey, crunchy flavor without the loaded calories and sugar of store-bought versions. Using natural ingredients not only ensures you know exactly what you’re eating, but it also helps you feel good about sharing them with family and friends.
Just imagine whipping up a batch for a movie night or an afternoon snack. It’s an easy way to satisfy your sweet tooth without sacrificing your health. Plus, customizing your Butterfingers means you can experiment with flavors that excite you!
For additional healthy snack ideas, check out websites like Healthline or EatingWell. Embrace the joy of guilt-free snacking and make your healthy homemade Butterfingers today!
PrintHealthy Homemade Butterfingers: A Guilt-Free Indulgence for All
Enjoy a guilt-free treat with these Healthy Homemade Butterfingers. Perfect for satisfying your sweet tooth without the extra calories!
- Prep Time: 15 minutes
- Cook Time: 5 minutes
- Total Time: 50 minutes
- Yield: 12 bars 1x
- Category: Dessert
- Method: No-bake
- Cuisine: American
- Diet: Vegetarian
Ingredients
- 1 cup natural peanut butter
- 1/4 cup honey or maple syrup
- 2 cups oat flour
- 1 cup dark chocolate chips
- 1 tablespoon coconut oil
Instructions
- In a bowl, mix the peanut butter and honey until smooth.
- Gradually add in the oat flour until combined.
- Press the mixture into a lined baking dish and refrigerate for at least 30 minutes.
- Melt the dark chocolate and coconut oil together until smooth.
- Pour melted chocolate over the chilled peanut butter mixture and spread evenly.
- Refrigerate again until set, then cut into bars.
Notes
- Try using different nut butters for variation.
- Store in an airtight container for freshness.
Nutrition
- Serving Size: 1 bar
- Calories: 150
- Sugar: 8g
- Sodium: 50mg
- Fat: 8g
- Saturated Fat: 3g
- Unsaturated Fat: 4g
- Trans Fat: 0g
- Carbohydrates: 18g
- Fiber: 2g
- Protein: 5g
- Cholesterol: 0mg
Keywords: Healthy Homemade Butterfingers, Guilt-Free Treats